When a WordPress website enters maintenance mode, the website’s content is hidden from visitors without being changed or otherwise affected. Visitors accessing your website when it is in maintenance mode see a maintenance screen webpage instead of the website content.
SWITCHING ON THE MAINTENANCE MODE
Your WordPress website enters maintenance mode automatically when you are:
- Upgrading your WordPress instance.
- Synchronizing WordPress instances via WordPress Toolkit.
If you are making changes to your website and want to temporarily hide it from visitors, you can manually put it into maintenance mode.
To put a WordPress website into maintenance mode:
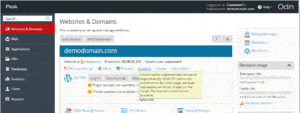
- Go to Websites & Domains > WordPress and click the name of the WordPress instance you want to put into maintenance mode.
- In the Developer tools section, click the change link next to Maintenance mode.
- Select the Enabled radio button in the Maintenance mode section, and click OK.
To take your website out of maintenance mode, select the Disabled radio button, and click OK.
CUSTOMIZING THE MAINTENANCE PAGE
Plesk WordPress Toolkit allows you to change certain attributes of the maintenance page to make it more informative:
- Change the text displayed on the maintenance page.
- Add a countdown timer.
- Provide links to social network pages.
To customize the maintenance page:
- Go to Websites & Domains > WordPress and click the name of the WordPress instance whose maintenance page you want to customize.
- In the Developer tools section, click the change link next to Maintenance mode.
- In the Screen Text section, you can change the text displayed. Use HTML tags to format the text’s appearance.
- In the Timer section, you can set up and switch on the countdown timer that will be displayed on the maintenance page.Note: The timer is only meant to inform the visitors about the estimated duration of the remaining downtime. Your website is not taken out of maintenance when the countdown is finished. You must do it manually.
- In the Social Network Links section, provide or remove links to social network pages.
- Click OK.
If you have coding skills, you can customize the maintenance page beyond the options described above.
To customize the maintenance page for a particular website:
- Go to Websites & Domains > WordPress and click the name of the WordPress instance whose maintenance page you want to customize.
- Click the “template” link at the top of the screen and edit the maintenance page template.
- Click OK.
RESTORING THE DEFAULT MAINTENANCE PAGE
If necessary, you can restore the default maintenance page.
To restore the default maintenance page:
- Go to Websites & Domains > WordPress and click the name of the WordPress instance whose maintenance page you want to reset to default.
- Click the “restore” link at the top of the screen.


 .
.

