Private Domain Name Servers allow your business to run DNS services under their own domain name as opposed to using our dns servers.
This setup is an advanced setup option that is available to all of our domain customers. It is assumed that you understand the basics of DNS and SOA before making these changes, and that you have the configuration IP addresses of your name servers before you begin.
Before following this guide, make sure you are logged into your Media Giant Design account.
To create Private Name Servers:

- Click on Domains > My Domains.
- Choose the domain you would like to create private name servers for and select the wrench from the menu on the right of the domain list.
- Click on Private Name Servers in the left hand menu.
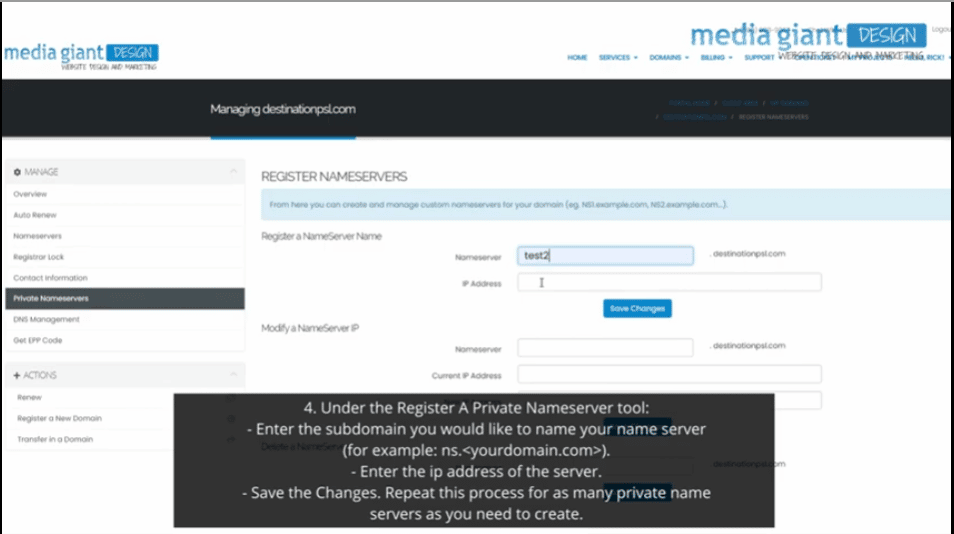
- Under the Register A Private Nameserver tool:
- Enter the subdomain you would like to name your name server (for example ns.<yourdomain.com>).
- The ip address of the server.
- Save the Changes. Repeat this process for as many private name servers as you need to create. If you make a mistake you may delete or modify the name server using the other tools on this page.
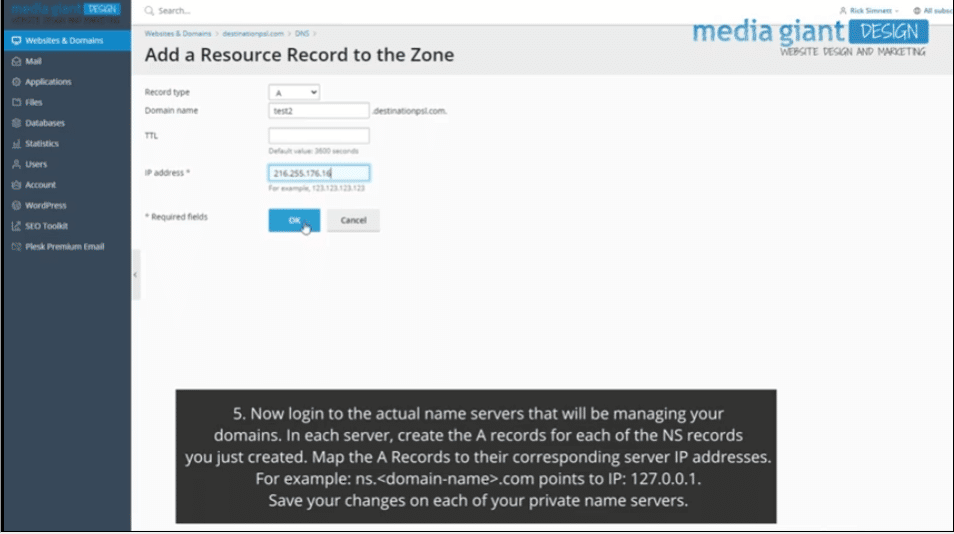
- Now login to the actual name servers that will be managing your domains. In each server, create the a records for each of the NS records you just created. Map the A Records to their corresponding server IP addresses. For example, ns.<domain-name>.com points to IP: 127.0.0.1. Save your changes on each of your private name servers.

Our systems will begin processing the private name server configurations as soon as you submit them, but it can take up to 48 hours from the point that you create the A records on the servers for the rest of the world to be able to see your domain name. Please be patient after making these changes.


 .
.

